Today, I am going to set aside my anal retentive nature for a split second so I can share some craft room photos with you. Because despite my best efforts (involving a rubber mallet and a stream of profanities that’d make the cast of Charm School blush) I couldn’t get the aforementioned shelf put together. Verdict? It’s a lousy piece of crap, and if we can find the receipt it’s going straight back to Lowe’s.
I don’t know why I was hung up on the shelf, when we don’t have any door trim or basemolding up and the floor is a painted, gouged, hole-ridden mess. It’s not like the room is actually done in the true sense of the word. But, it is in my nature to freak out about things like stupid wire shelving units. And so I did.
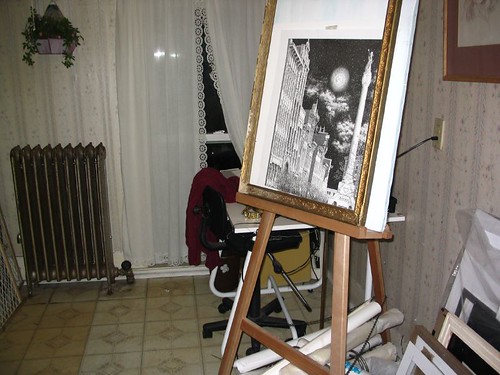
Anyway, without further ado, I give you my new and improved Laundry and Craft Room. But first, a few “BEFORE” pics:

(View of the back of the room – now partially eaten up by the bathroom and closet)
(View of the front of the room, from doorway)

(View from the doorway)
Because the craft room used to be an upstairs kitchen (our house was a duplex for a while) it had cabinets, a sink, old paneling, and cheap lick-em-stick-em vinyl floor tiles that were peeling off all over the place. When we gutted the bathroom, we gutted half of this area too – and moved the walls and plumbing around. The craft room got smaller, the bathroom got bigger, and we added a closet. You can see a decent explanation of all that here.
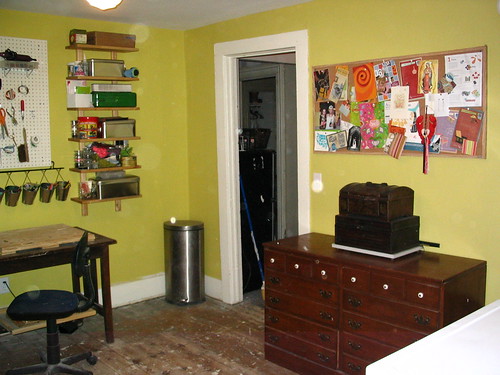
My mission with this room was to get it in usable condition quickly; I need to start crafting before my blood pressure gets any higher. And usable, it is – even pretty, if you can overlook the floor and the lack of trim. Here’s an AFTER view from the back of the room (near the closet door):
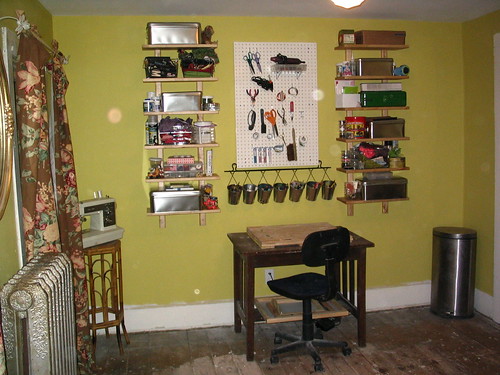
The work table and cheapo office chair are a bit miniscule for the room, but I’m sure I’ll find better furniture when I hit the garage sales this summer. What I really love are my shelves,cups, & pegboard. So many of my supplies are out in the open now, making crafting and clean-up that much easier.
Here’s another shot of the shelves and pegboard. The pegboard is white plastic, and was $14 for a 2×4 sheet. We cut it down to about 2×3 so the cups would fit nicely underneath without encroaching on my work surface.
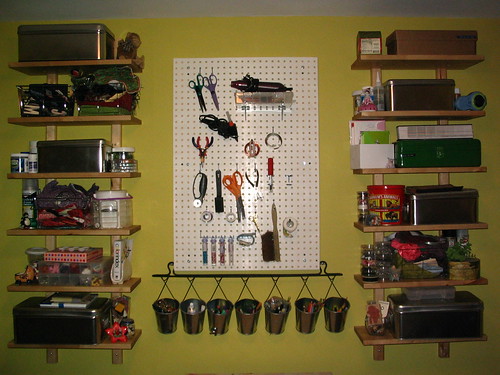
As you can see, I’m container-happy. Everything is either see-through or well-labeled so I know what’s inside without having to dig.
Here’s the other side of the room – a blurry one, I apologize. My hopeless little shelving unit was SUPPOSED to go in between the washer and dryer to hold our laundry goodies. So ignore that gap and the pile of detergent bottles, ok?
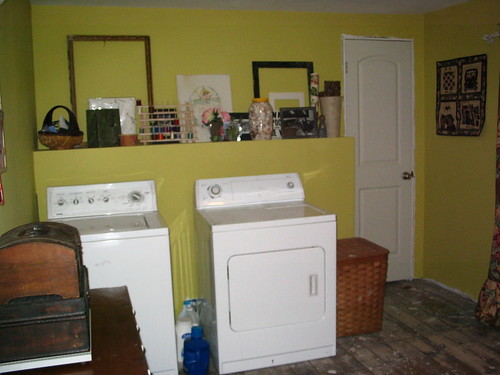
The shelf behind the washer and dryer hides all of our plumbing, but also comes in pretty handy. That uppper area draws a lot of attention for some reason, so maybe I’ll put some cool artwork there. For now, it’s just holding a bunch of supplies and doo-dads. Here’s a close-up:

This is the view from the back of the room, facing the doorway. I grabbed an unused dresser more storage, and it’s chock-full already.
So….. that’s it for now. The big reveal! I’m happy with how it has turned out. It has a new ceiling, a few new walls, a new light fixture, new paint and new curtain rods. Everything else in the room was scavenged from elsewhere in the house.
It wasn’t a big spender project, but it’s not over yet. We still have trim to add, and flooring to consider. We’re holding on both for now because it’s just not that important to us yet, and because the entire upstairs needs new flooring so we figure we’ll wait and do it all at once.
Until then, I just won’t look down ;)
As always, you can see the full photo set on Flickr: Fixer-Upper’s Craft Room Photo Set

My craft room “after” is so very, very close to being ready… one very stubborn shelving piece is all that stands between me and that great feeling of accomplishment I’ll get when I post the pics. But dammit, it’s one tough shelf – and last night a flat tire derailed my plans to conquer it. Instead, I spent 1.5 hours wandering aimlessly around Walmart while I waited for a new tire. Pffffft.
So to buy myself another day, I’ll share with you my “inspiration collection” – a bunch of ideas I threw into a folder for reference when I was pulling the room together. Because no space should be without inspiration, especially not one meant for creative endeavors.
First, the color. I flip-flopped between blue and green, eventually settling on green (as usual). I wanted an energizing green, something trendier and brighter than the other greens found throughout our house. Kinda like this:
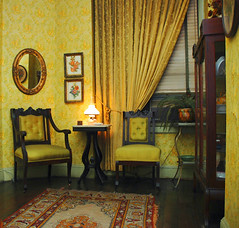

See? Lime green can be both modern AND traditional. Woweee.
Crafty blogger Heather Bailey’s studio was a major source of inspiration, too. She is a fabric designer, and you can see she’s got an amazing eye for mixing color and pattern. Everything she does is delicious and super cute. You can see pics of her studio on Flickr.

My craft room isn’t nearly as beautiful, but I did try to work in some girly details and hope to sneak more in as I go.
As for organization, I had some good stuff to work with – I’m taking almost everything I purchsed last year when I had to cram my craft supplies into our downstairs office. (You can check that out here.) I had shelves and Tupperware galore; what I added was a pegboard to hold my tools out in plain view. Kinda like this:
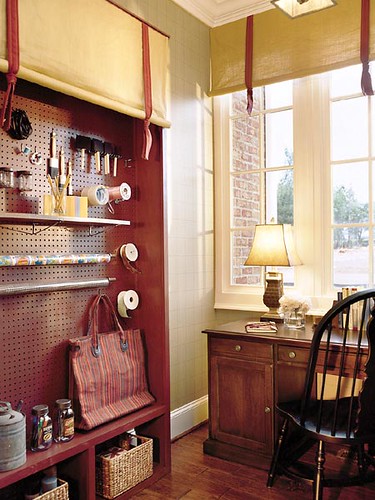
It came together nicely, and now I have no excuse not to craft. Oh, execept the old “working on the house” excuse, which explains why I never do 99% of what I plan to do.
Stay tuned……. it’s coming, I promise!
After my last tirade about the weather, you might think Central New York does not get sunshine until July. But we had some good karma coming after all the shoveling we did this winter, and it came in the form of a gorgeous, cloud free weekend. Two entire days of sunshine and 70 degree temps. In April. 4 days after a major snowstorm.
Needless to say, everyone shed their winter layers the minute the temperature started to rise. It was a sea of pale white flesh peeking out of tank tops and flip-flops. This was the golden weekend, the one that brings everyone outside and makes us all cheerful and friendly. The neighborhood turns into Pleasantville. Tons of smiling and waving. In a few more weeks we’ll be back to our normal grouchy selves, but it’s fun while it lasts.
Because it was beautiful, we didn’t stay indoors much. We did get the old leaves off our lawn (we were not adequately attentive last fall – oops) and Iweeded out the garden beds. Amazingly, the weeds shot up before the snow ever melted. And unlike the crocuses, they survived teh storm just fine.
But my favorite part of the weekend was a long walk; I spent over an hour gawking at a neighboring city’s historic homes. It’s a city slightly bigger than ours, with similar houses. Theirs, however, have been well-restored in the last few years and every time I drive through it improvements jump out at me. People there are BUSY!
I snapped a bunch of pics for inspiration – specifically, we looked at color schemes and porches. I’ve got a whole set of Italianate porches to show you later, but for today here’s a “best of” tour from yesterday’s walk. As always, click the thumbnails to view nice big photos on Flickr.

My absolute favorite house in this neighborhood; it’s featured in the American Painted Ladies book, and for good reason. The paint scheme is amazing! And how cool is the hedge leading up to it? It’s very Secret Garden.

Another great color scheme. We also like the way the porch steps have the built out railing area. Can’t remember what that is called but it’s nice looking – and a perfect spot for plants to sit.

I love the windows on this place.

Great colors and a really unique house/porch. They have a black iron fountain and fence outside as well, to the right of this pic.

The carving details on the top of this place are very cool. And the turret room thing. I always wanted my bedroom to be in a turret, just like Anastasia Krupnik.

A huge italianate (now a funeral home) with a huge carport. And a great example of why all white paint makes an amazing place waaaaayyyyy boring.
The craft room is almost ready for a big reveal, but with the weather so nice I wasn’t working on it much this weekend. I figured this eye candy would tide you all over!
In writing this post, I am going to reveal just how pathetic my life really is. Because last night while all the hip cats were out sipping tequila shots out of each other’s navels, my friend Tracy and I went to see a movie. This wouldn’t be embarrassing, except that our choice in movies happened to be one that was populated by hoards of hormone-laden tweens. So when I tell you what movie we paid to see, keep in mind that our choices were severely limited and it IS the #1 movie right now. We can’t be the only ones who got sucked in.

So, out with it… we went to see Disturbia. (The star is a kid named Shia LaBeouf; his name alone makes you want to watch, doesn’t it? Imagine going through life with that name and actually becoming successful! It’s a miracle.) It actually wasn’t a terrible movie, despite the out of control giggling, flirting, shrieking, seat-changing teenagers in attendance. What is with the constant seat changing? Is this some new flirting tactic, or just a symptom of ADD? Anyway, I digress. The movie is about a troubled kid under house arrest with voyeuristic tendencies; after doing a great deal of spying (mostly on the hot bikini-clad neighbor) he begins to think his neighbor is a murderer. Kinda like “Rear View Window”, if it were directed John Hughes.
The reason I’m mentioning Disturbia here is that the house, featured very prominently in the movie (since Shia can’t leave it, lest his ankle bracelet notify the cops) is a beautiful L.A. Craftsman bungalow full of Stickley furniture and a few really amazing light fixtures. I spent half the movie watching the background, rather than the stars. The kitchen, porch, front yard and an upstairs bedroom are all featured prominently. Unfortunately, I can’t dig up any pictures of the house. Apparently everyone else is more interested the bikini chick. But if you’re a bungalow owner looking for inspiration, grab this movie when it comes out on DVD!
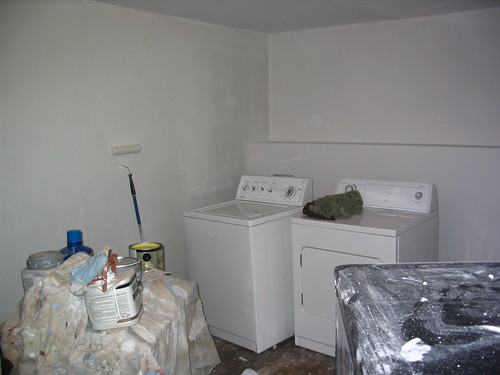
Guess what? The craft/laundry room got a fresh coat of paint on Monday night! Above is a photo of the room after priming, before paint. Pretty boring, right? But ohhhhhh….. you should see it now!
I’m beyond excited. I haven’t had full use of my craft room (a big, lovely open space for making large and small messes) in about a year and a half. For a while, my brother Cody was living upstairs and my craft room became his kitchen/dining area. Then, we tore apart the upstairs and left it torn apart for about a year. In the meantime, I’ve been hoarding my supplies in our downstairs office. But it’s got a newly refinished floor and no room to spread out, so very little creative energy has been spent there.
I’ve always been into arts and crafts. My grandmother is an artist, and her creativity and love of art definitely trickled down to me. I’m not nearly as good as she is, but she has a few years on me. Maybe I’ll catch up one day ;)
I don’t stick to one media; I bounce from project to project. I’ve dabbled in everything – quilting, screenprinting, stained glass, painting, collage and paper crafts… I even make my own lawn decorations. Because I can’t commit to a single craft, my arsenal of supplies has become quite expansive over the years. Which is why I require an entire room to house them. Luckily, we have not one but THREE unused rooms at the moment; space is not really an issue for us!
I’m working on pulling the room together now, so I don’t want to give too much away. But here’s a sneak peak at the color I chose:
As you’ve probably noticed, I’m a fan of green. We have a green kitchen and two green bathrooms. I ALMOST painted this room a nice light blue since we’ve got so much green elsewhere, but in the end I decided it’s my zen room so I deserve to paint it whatever color I want. And the color I wanted was a relaxing-yet-energetic limey green. It’s not for everyone, but I think it looks great!
Stay tuned for “After” photos once I get my moutain of supplies organized.
The bad news:
Today’s the last day to get your taxes filed.
The good news:
After you finish filing, you’ll have worked up an appetite. As luck would have it, today is Free Cone day at Ben & Jerry’s.

See? Life isn’t so bad.
When I tried conning you guys into buying one of the beautiful old houses around here, the response was “Ooooh! So tempting. But what about the snow?”
Yeah. What about the snow?
Normally I’d try to tell you that by early spring, everyone has forgotten about the snow because it’s so idyllic here. I would tell you that when the grass is green and the flowers and trees start blossoming, we all head outdoors and stay there until November. That we are only a few hours from some of the most beautiful places on earth – most notably the Adirondack Mountains but also the Catskill Mountains, Ithaca’s Gorges and the Finger Lakes Wine Trails. That we’re a 1/2 day from three amazing cities, Toronto, Boston and New York. And you’d start to see it all add up. We’d seem less crazy for settling here.
But today I have very little love for my state because we woke up to this:

View from the front porchÂ

View from the backyardSo I might want to take Kristin up on her offer to trade houses for a season. And if you’re looking for affordable small town life in a great historic home? Pick Eutaw.
We’ve been in drywall-dust-hell for a few weeks now, perfecting the craft room walls and ceilings with multiple rounds of light skim coats and even lighter sanding. Every time I sand, even if it’s only a small little section, I have to shower immediately afterwards because I come out looking like the White Witch of Narnia. It’s a major time-suck.

Yesterday, home alone with the whole day in front of me, my plan of action was:
1. Finish the last round of sanding for both the ceiling and the walls
2. Prime the ceiling and walls
3. Hit the gym for a nice long de-stress run
The hitch was this… I didn’t want to sand, paint, shower, run, and then shower again. Why shower before a sweatfest? So I decided to find a way to protect my gorgeous mane.
I always wear a baseball cap, but that doesn’t help much because I have too much hair to tuck up into it. Yesterday, I got more creative and found the perfect hair protector. Pretty, it ain’t – but it worked like a charm!

I wore my dollar-store shower cap (originally purchased so I could soak in the tub without getting frizzies – I have naturaly wavy hair that does funny things in humidty) while I worked. After 2 hours of over-the-head sanding and another 3 hours of priming, I’m happy to report that not an ounce of drywall dust got through.
Having trouble talking your husband into a clawfoot tub? Send him this!
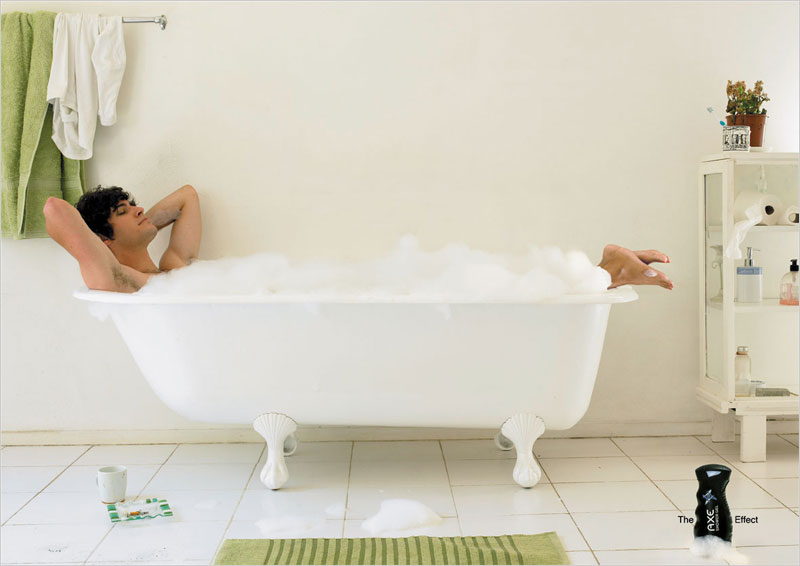
(It’s an ad for Axe body spray. Too funny not to share. Sorry, Gram!)
We installed a new porcelain tile floor in our kitchen about 1.5 years ago. It has held up beautifully, and I’ve never once regretted the color or style. The dark, varying color and rough texture hide almost everything, except for mysterious muddy boot prints that no one cares to claim responsibility for. (My booties idea? Never really took off.) And the darker grout color isn’t showing much staining despite the fact that we regulary spill coffee all over it.
We use a vinegar & water solution in our Swiffer WetJet to clean this floor about once a week; it’s high traffic (for both us and the dogs) and gets dirty pretty quickly. It’s recommended you reseal your tile floors every 1-2 years. Porcelain is less porous than most other materials, but since we’re rough on the poor floor I thought it was time to give it some TLC. With an entire free day laid out before me, I rolled up my sleeves for some real excitement. Floor sealing…….wheee!
First, I went to town with a broom and a vacuum to get all the dirt and grit up. Next, I made a very thorough pass with our Hoover Floormate and the Grout Cleaner that goes with it. Using the Floormate is entertaining; you get to see all the dirt you thought didn’t exist suck itself up in liquid form. It collects it, so you can marvel over it and show your husband just how dirty the floors really were. It even found some dog hair the vacuum couldn’t locate. Amazing stuff.
During the Floormate scrub-down, I gave special attention to stained areas. An old toothbrush came in handy for getting gunk off, and I used Goof-Off for a few little paint smudges that couldn’t be scraped from the surface.

When I was confident I’d done my due diligence with the cleaning and preparation, I pulled out the AquaMix Penetrating Sealer (available at good ‘ole Lowes, and recommended by a tile pro standing in the aisle next to me!). I purchased the “natural look” version – no high-gloss sheen for this girl. One quart-sized bottle was enough to do two coats.
The process took about half a day, but it’ll keep our tile looking newer longer. Totally worth it, since putting the floor in was both back-breaking and pricey.
If you need to reseal your own tile floor, or are wondering about cleaning techniques and products, take a look at AquaMix’s website. They have a great “surface finder” feature that tells you what works best for every type of tile.
AquaMix Website: http://www.aquamix.com/
|

