Adding trimwork and molding is one of the best ways to add elegance to a plain room; I can’t tell you what a difference it makes. It’s one of the main reasons historic houses have so much charm… they have layer upon layer of built-up trim throughout the house accenting the windows, doors, and walls beautifully.
To get ideas for our bathroom molding, we took our cues from the original trim found throughout the house. It’s not over the top ginger-bready; it’s simple, curvy, and rather weighty. We’ve often tossed around the idea of having molding custom-cut to match our original, but given our budget it just never happened. And that’s ok. The molding scheme that Teague designed matches very closely, and I really doubt anyone will notice the difference.
I’ll admit, this isn’t the easiest DIY project out there – old houses don’t have right angles, so cutting the inside and outside angles is a crapshoot at best. We had half new walls, half old walls, which basically just means chaos. They sell tools to help you find the perfect angle, but that’d take all the fun out of it, right? It can also be a pretty expensive endeavor, especially if you look at the fancy pre-built stuff. But with a little creativity, you can get beautiful results withought the super hefty pricetag.
Our trim ended up being quite complex……. you might say we got carried away. We’ve been known to do that on occasion, and it’s the reason this bathroom is wayyyy over budget. But the results are FANTASTIC.
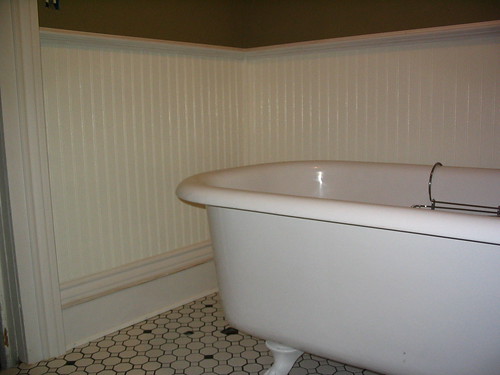
Here is what the bottom half of the room looks like now:
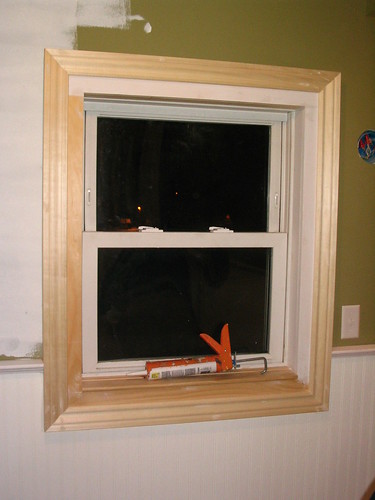
We just finished installing the crown molding last night, and the doors and windows are done as well. Everything needed two coats of primer, and two coats of semi-gloss white paint. We caulked the seams to ensure a seamless look, so even though the baseboard is made up of 4 seperate pieces, it looks like one giant one.
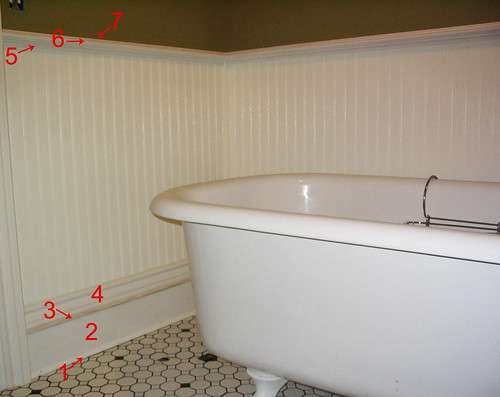
Including the crown molding, we applied 8 pieces of trim to each wall. Plus beadboard. Plus some fancy-pants trickery around the windows. That’s alot of cutting and measuring, not to mention priming and painting. Here’s a little diagram showing how the lower half of the wall came together:
The small piece of molding above the chair rail is hard to see, but it was an essential add-on; since our old walls were a little wavy, this piece was bendy enough to curve with the wall – unlike the chair rail. No gaps!
A few tips and ideas for building your own custom molding:
- Think about ways to use cheap molding pieces such as quarter round to add detail to plain boards. Our baseboard is made up of 1″x6″, two pieces of quarter round, and a piece of nice molding on top. It looks much more expensive than it was. The quarter round hides the seams, meets with any ups and downs the floor might have, and adds complexity without much extra cost.
- If you’re going to paint your trim and money is a concern, think about using pre-primed MDF. It’s much cheaper, and looks exactly the same when painted.
- Bring home samples pieces to test your idea before buying a whole batch of trim. Most Big Box stores and lumberyards have leftovers that you can get for a good price, or they’ll let you cut a 1″ piece off of something on the shelf.
- Buy your trim in lengths that will need as few splices as possible. In some cases splices are unavoidable, especially on long walls, but the fewer the better. If possible, plan to hide the splice behind furniture, appliances, etc.
- Measure twice. Then measure a third time. Seriously – it’s easy to get your measurements wrong, and this stuff isn’t cheap!
- If you can borrow a finish nailer, do it! It’ll save you tons of time and frustration, not to mention hammer dings in your new trim. (Thanks for letting us borrow yours, Garrett!)
- After priming, fill in your nail holes with wood putty or caulk before your final painting. The primer makes them extremely easy to see.
I highly recommend the book “Decorating with Architectural Trimwork: Planning, Designing, Installing“ for ideas on how trim and molding can transform a room. Our teeny tiny library had it, so yours probably will to. Once you see the possibilities, you’ll be as obsessed as we are.
As always, more pics can be found on our Flickr account: http://flickr.com/photos/fixerupper/


Comments, Thoughts, and Feedback
Oh man that looks wonderful! I can’t wait to see the rest. It’s so close to being finished and that’s always a good thing, especially when it’s a bathroom.
Oh, the prettiness. THE PRETTINESS.
Looks so good, y’all.
You said it. Trim work is what you block *months* into your schedule for. My first floor trim work took about 18 months:
http://www.brooklynrowhouse.com/house/diningroom
I’ve been blogging on my master bedroom/hallway renovation, which is mostly new trim and cabinetry, since early October. It probably won’t be finished till the end of March.
Beautiful work! And a timely post for me – one of my [many] current obsessions is with trying to get an idea about what I can do to restore period-appropriate trim to our previously gutted house. Because of a lack of experience, no fancy tools, and limits on time, money and patience, I’ve already decided that whatever we do has to be made up as much as possible from stock items, but I have seen some beautiful work created from stock molding – including yours. I’ll definitely look for that book. Does it also give instructions on how to do the trim, or just ideas for design?
Now that’s some purdy trim work!
Lookin’ good~
Great job – you can really see all the work and planning that went into that room. I bow down to your skills. (and im totally addicted to your blog..its fabulous!)
Beautiful.
And, so thoroughly explained that I can’t think of anything to add. You’re spot-on with the priming and then caulking. It makes it so much easier. I usually put on one coat of primer, caulk, put on a second coat of primer, and then paint.
Mindy,
I have serious bathroom envy. :) It looks fabulous!!! :)
I’ve long had an idea of what I wanted to do with our bathroom (hideously remodeled in the 1980s) when the time comes, and what you’ve done with yours is nearly perfect! I’m definitely showing your posts to my husband to encourage him in moving forward with getting that room in order.
looking really really nice, but no surprise because we all know whay good work you guys do there :)
Awesome :) We’re adding “built-up” trim to our first room this weekend. Our ceilings are lower, so we’re starting with a 1×4 instead of a 1×6. We’re spending time on trim because, like you said, that’s where so much of the character and charm comes in – and that’s what our house needs!
Your baseboards look fantastic. Thanks for the great post.
Jacci
We love to hear from you, dear readers.