Note: This is Teague’s second post in 2.5 years! Let’s all make him feel welcome, and maybe he’ll come share his how-to’s (which are much more thorough than mine, since he tends to lead the process while I follow along) more often! – Mindy
STEP ONE:
The first step to installing our free-standing chrome fixture (a Sunrise Specialty from Vintage Tub and Bath) and tub drain (Strom, also from VTB) was to rough-in the layout. This was done prior to finish materials,ie. flooring, walls, etc. After following the manufacturers schematics for rough-in dimensions and deciding on a final resting place for the clawfoot tub we were ready to run the hot/cold feeds and PVC drainage under the floor.
We used .5″ copper for water supply and 2″ PVC for drainage. 1.5″ PVC is enough to meet NY codes, but bumping it up to 2″ is a good idea for clog-free operation long-term. The chrome drain and overflow are only 1.5″ above the floor so our transition to 2″ is under the floor. This is achieved by using a 1.5″ to 2″ coupling. Once the under side of the floor was roughed-in, we could start making connections from the top side.
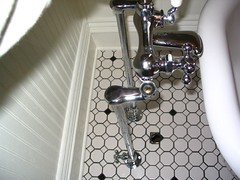
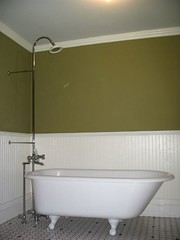
Our fixture is a free-standing model, meaning the water feeds come vertically through the floor and the faucet handles and spout do not connect into the tub. The entire fixture consisted of 6 sections.
STEP TWO:
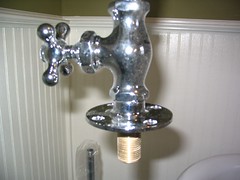
Starting from the floor up I installed the .5″ threaded end of the mounting flange through the floor and made a tight connection to the copper feeds previously ran. This required 2 people, one under the floor holding the feeds and the other up in the bathroom to make the connections.
STEP THREE:
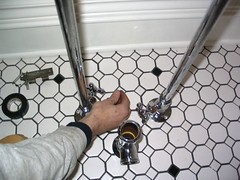
The second section you need to install is the multi-turn shut-off valves, hot/cold,which need to be in the same position for aesthetics and functionality. To achieve this, leave a section of copper under the floor un-soldered so the shut-offs can be rotated into position once the tight connections above the floor have been made. We did our soldering after connecting the arms to the risers (explained in step five).
STEP FOUR:
The next section to put together is the supply lines for the hot/cold feeds. Make a tight connection into the shut-off valves.
STEP FIVE:
Attach the arms that connect the supply lines to the faucet. These took some adjusting and teflon tape to make a tight and parallel connection. Once you’ve got that figured out, you can go ahead and solder the copper below the floor, making sure the shut-off handles line up the way you want them. This took two people as well; one above to hold the risers straight, and one below the floor to solder.
STEP SIX:
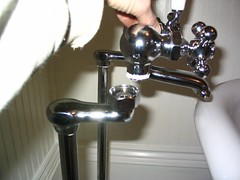
Make the connection from the end of the supply line arms to the faucet.
STEP SEVEN:
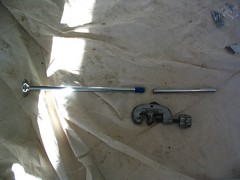
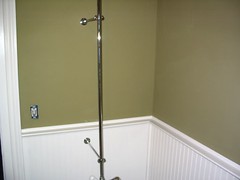
Next, you’ll attach the shower riser and mounting brackets. I measured and then cut the brackets to size using a pipe cutter. To keep your chrome clean, use painters tape on the “keeper” side to protect it while cutting.
We were surprised to find that the drywall anchors that came with the set were visible behind the bracket’s mounting plate. The screw holes are very close to the edge, so the plastic anchor is not hidden completely. We screwed into a stud and thus avoided using the plastic anchors. Not a huge deal, but worth noting.
STEP EIGHT:
Attach the shower head to the shower riser. Once you’ve got everything together, cross your fingers and test it out. Be sure to check each connection point for leaks.
Next up, I’ll explain how I installed the drain.



Comments, Thoughts, and Feedback
Great job describing all that. We should be doing out bathroom, hopefully within a year, we’re looking for a tub right now. We found a 6′ one on craigslist, it was already gone though, the 6′ ones are harder to find. I’ll be happy with a 5′ one though.
We’ll be doing this next week! Heeeeee!
Wow, you did a fantastic job. My husband and I are renovating our own place as well. Part of the renovations include re-using an existing cast iron claw foot tub. Feel free to check out our progress, http://journal.halcyonniche.com.
Where do you get a shower rod for this type of tub? Thanks
Hi Susie,
We got our shower enclosure (the rod & parts to hang it) from Vintage Tub and Bath – try here: http://www.vintagetub.com/asp/feature_item.asp?cat=89&subcat=110
If you’re not sure what you need, give their customer service people a call. They are very helpful and know what they’re talking about when it comes to tub parts ;)
~Mindy
My question is, if space permits can you put a claw tub on top of an existing shower pan and allow the tub to drain into the existing shower pan. Can the shower floor hold the weight of the tub. Right now I have dual shower heads in a tiled shower enclosure. The size of this enclosure can hold a standard size bathtub. I don’t want to have to tear out the whole shower to just enclose a bathtub.
Great job, Teague! My family is preparing to do some renovating in our bathroom. I have everything I need to do the job except the courage to try it on my own. You could put everything I know about plumbing into a thimble. Frankly the idea of learning it on the job freaks me right out. Our clawfoot tub came with our 1910 house, but it doesn’t have a shower. We want to take off the existing faucet & add a shower system, with riser, & enclosure. I have the system required including supply lines. Our tub & shower system is different from this one. The faucet is attached to the tub, rather than sitting up above the tub like this one. I’m looking for some guidance to calm my fear of doing this.
Great article and love the pictures for illustration. This is definitely worth doing yourself. I bought a fixer upper last year and we are slowly completing our renovation. The bath is the next project! I’ve found Vintage Tub and Bath has the best selection and their customer service is helpful.
Well Done! Freestanding faucets are my favorite and in that finish it really looks awesome. I went with an oil rubbed bronze with American Bath Factory and have been really happy with it also… we couldn’t go with the cast iron as my plumber advised me the weight would be too great for our second floor bathroom.
We are renting a home with a claw-foot tub, so don’t want to spend a lot for a shower enclosure–any ideas????
as of this date: 08/23/2011,
i am in the process of having a clawfoot tub/shower installed in a bathroom remodel project.
Randolph-Morris tub/shower combo was ordered from Vintage Tub&Bath.
i am NOT PLEASED with some of the design features. Specifically the 2-piece shower riser =0/
MAKES NO SENSE!! LEAKS LEAKS LEAKS!!
why isn’t this riser in ONE-PIECE???
Does anyone have the link to the drain install section?
We love to hear from you, dear readers.