Choosing a vanity for the master bathroom was a drawn out process – much like any design decision I’m involved in. We looked at all sorts of store-bought vanities, but nothing in our price range screamed “take me home”. We looked at antiques, but didn’t want to put a hole in anything too valuable and then set it in the bathroom where it’d no doubt get water damage and makeup stains all over it. When I happened upon an adorable vintage dresser at a local thrift store that was just the right size, I felt like I hit the jackpot – especially after I saw the $25.00 price tag!
I quickly realized I wasn’t up for stripping it, since it had a milk paint finishing on it and the stuff is notoriously hard to remove. Instead, I decided to paint it. And since I’ve been dying to try out milk paint since seeing the stuff at Brimfield this past summer, that is what we went with.
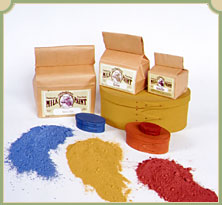
The milk paint we ordered (from www.milkpaint.com) comes in powder form; it’s made of milk protein, lime, clay, and earth pigments. It is best used fresh – when you’re ready to paint, you mix it with water (1:1) and go to work.
STEP 1: PREP
First, I had Teague cut out a hole for the sink drain and plumbing. Then I spent about 4 hours prepping. This is the most important step when painting – the better you prep, the better your results will be. I removed all the stickers and gummy residue with Goof Off, and then scoured the entire thing to get any grease, smudges, dirt, etc off it. Then I sanded everything down with 100 grit sandpaper to give the existing layer of paint some “tooth” for the new layer to bond to.
STEP 2: MIX THE PAINT
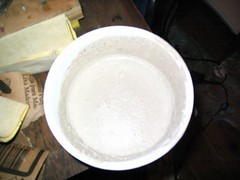
I made the paint in an old plastic container. Anything you don’t use has to be thrown out (it doesn’t last long, overnight at best) so I mixed small batches. (A little goes a long way, I found – I guess I didn’t need to order the gallon of powder, but now I’ll have tons of paint leftover for other projects.) I carefully measured out .5 cups of Light Cream power and .5 cups of warm tap water. I also mixed in 1 cup of ExtraBond for the base coat; this is to help it stick to pre-painted surfaces.
Even after stirring really well, there were a few grainy bits. I wanted them there since I was going for that look, but you can strain the paint through a pair of nylons if you want to get rid of them.
The first coat went on pretty smoothly. About 30 minutes into it I had to run and get some water to thin it out with because it thickens up quickly and becomes hard to spread. Keep a paint stick handy too – you’ll need to mix it about every 10-15 minutes.
STEP 3: FIX YOUR MISTAKES
After two hours, I went back to check on things and see if it was totally dry. It was, but I quickly noticed that the edges were bubbling and peeling. In my hours o’ prep work, I managed to forget to sand the shiny gold paint that was used on the very edges of the drawers. Ooops….
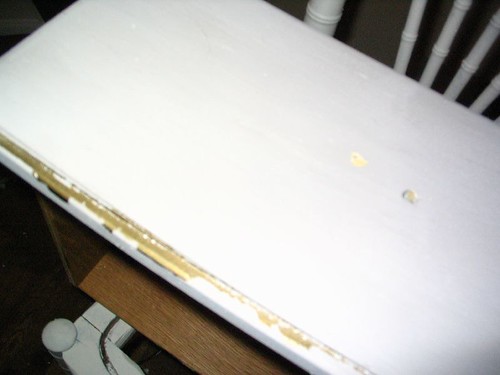
DOH. Frustrated, I peeled off every bit of milkpaint I could, including a few tiny bubbly spots on the drawer faces. I sanded the gold paint off the edges completely, and went back to mix a second coat of paint – this time, I added 3 tablespoons of Driftwood to the Light Cream, to darken it up. I used ExtraBond on this one too, since I was having adhesion problems and I’d removed all of the first coat at the edges.
STEP 4: FINAL COAT
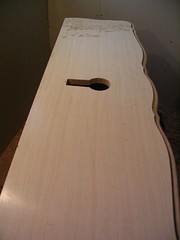
I ended up doing 3 coats total; the last one had 6 tablespoons of Driftwood in it, and came out a nice tan/khaki color that is similar to a color found in our shower curtains. I love the finish. It’s ultra-flat with a tiny bit of graininess, and has nice subtle color variations throughout. It’s hard to get a good photo, but the one below (after 1 coat) gives you some idea as to the barely noticeable “streaks” of color you can produce:

I still have to clear coat it – since it’s going to be in the bathroom I want to be sure it’ll hold up to water and the occassional flying mascara wand. But just for fun, we set it up in it’s new home for a photo:
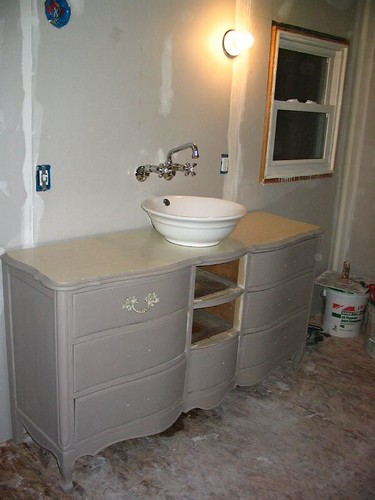
There’s another step we’re mulling over… what to do with the top of it. Currently, it has some type of old-fashioned laminate surface on it. It’s not in bad shape, but the color is a bit to yellow for my taste. We knew paint wouldn’t stick well or be durable enough, so that’s out. It has to be something thin, since the plumbing and faucet height don’t give us much wiggle room. We’re thinking of trying to cut a piece of veneer to match – stained and coated, of course. Anyone have a creative solution to our vanity-top dilemna?
As always, more photos on our Flickr account – http://flickr.com/photos/fixerupper/



Comments, Thoughts, and Feedback
Use a piece of the same material/fabric you will be using for window treatments, then cover with a thin sheet of glass. Easy to clean, and pulls your other colors and patterns into the rest fo the room.
depending on how realistic the laminate looks, a darker tinted shellac might add color and depth to the surface. of course you’d have to clearcoat that too to protect from water.
I would say take a piece of fabric like someone else mentioned and you can modge podge it on there…then you can also put a couple coats of clear coat on it to protect it even more…it would add a nice texture to the bathroom as a whole.
Those are great suggestions.
How about a faux painted finish.
The paint colors you selected csn be mixed to get variations of your existing theme…sponge, veins, marbilize it…
The glass idea is would add a nice finished look. And to take it one step further you could add a length of detailed trim board to the back to a height below your faucet done in the same finish as yout top.
We used an old oak 3 drawer dresser in our master bathroom with a sink insert that has extended sides to a rectangular shape. We used a salvage piece of floor baseboard about 8″ high. Ours was restained and sealed, drawers retrofitted for plumbing. We love the look.
Now don’t forget the candelier for the bathroom on a dimmer. Have fun!.
the fabric sounds ok but the floor tile would be soo cool but maybe its too thick. had a painter friend did oak dresser with a marble top that was sharp. i like the beadboard on the wall because small room lots going on and if it was me id like that tub to stand out
How about some of the new stick-on metallic look tiles — they are used now for kitchen backsplashes. They would be thin and also easy to cut out and stick around the sink, and could match nicely with the faucet. (I just found some similar to what I mean on homeimprovements.com) Maybe using tin ceiling panels would look good, too, and provide an added texture — you can get those in whites, metallics, colors.
Sorry, the website is improvementscatalog.com.
Holly, thanks for the idea – I have never seen those before! Everyone else, the metal stick-on tiles are here:
http://www.improvementscatalog.com/Parent.asp?product=173429x&dept%5Fid=1
There is special primer you can get that will allow paint to stick to anything. Many paint companies will sell primers for non-porous surfaces. The dresser would look lovely painted the same on the top. Maybe a marine paint clear coat?
It looks great! My daughters have the exact same dresser that is wait for it’s total makeover. It’s not too pretty,now, hehe, but your project shows the potential it has!
if possible, just remove the top and turn it over. molding profile will be reverse this should give you wood surface and the paint will stick great. reattach the top, fill any screw holes on the upper surface and you’re ready to go.
We love to hear from you, dear readers.