Historically, what I’ve ever heard from people who have worked with contractors is about 90% negative. They’re messy, they’re never on time, they raise the price mid-project, they disappear for weeks, etc. I know many people dread working with contractors, but being on the flip-side of the coin I see the other side of things. I have seen how weather can tremendously affect the timeline and overall profit. Or how a mid-project discovery, like finding rotted wood or a broken pipe, can mean days of extra work – resulting in a higher cost for the client. I’ve also seen plenty of people come to him way too early in their process, before they have thought through their needs – asking for estimates when the project is so gray and fuzzy it’s nearly impossible to put a pricetag on it.
My suggestions to help make your dealings with a remodeling contractor smooth and stress-free are as follows:
- Have your idea pretty well thought out before you call a contractor. Rough sketches and/or magazine clippings are great starting points. You don’t have to know every little detail, but if you haven’t decided on the basics then you can’t expect a good cost estimate.
- Have a budget in mind and share it early on. As we all know, there are varying ways of completing any given project; if your contractor knows what he/she is working with, they will have a better idea of what you’re expecting. They’ll also be able to tell you what materials you can afford in that price range.
- Expect the unexpected, and have a slush fund. If you have an old house and you haven’t seen what’s behind, or underneath, or within something you’re about to tear out, chances are you’ll uncover some type of bad news. And that bad news will cost you. That’s why old homes are so much fun, right? All those little surprises ;)
- Pick someone based on referrals, not an ad in the Yellow Pages. If your friends don’t know anyone, ask the neighbors. If someone has a sign in their lawn, or has obviously just gotten work done on their house, ask them about their experience with that company. A local lumber yard or hardware store could also give you some names. Most of the horror stories I’ve heard are from people who selected some random company without getting references first.
- Inspect the work as it goes along. Communicate with the contractor regularly. I don’t mean drive them crazy nitpicking their work while they are trying to go about their business – that’s a big no-no. But if you see something that you aren’t happy with, or if you change your mind about anything (which happens once you can actually see things in front of you rather than as a drawing on paper), tell your contractor right away. Smart contractors, like Alek Air, encourage clients to watch and inspect the work that is being performed.Don’t wait till the end of the project and then start complaining that it wasn’t how you envisioned it in your head. It’s much easier to fix, swap, or alter something mid-project. If your contractor is good, he/she will want you to be happy. They will do what he can to solve the issue. Keep in mind, though, that changes affecting the scope of work or materials used will probably affect the bottom line – you can expect to see a “Change Order” form ;)
Unofficially, I also suggest feeding, watering, and being kind to your contractor. A cup of coffee and some friendly banter can go a long way toward building a good relationship! It’s also likely to buy you a few freebie favors ;)

The hotter the day, the further his legs splay out behind him. Today it’s 95ish and humid. I just got done mowing the lawn, so I’m getting ready to suck down some popsicles and join him on the cold tile floor.

Frogman, recuperating from a hard morning spent doing absolutely positively nothing.

Really, really tired of me snapping his photo when he’s trying to sleep.

It’s things like the CIMA ladder that make me want to become an industrial designer. Call me superficial, but I would trade our beat up old wooden ladder for this lime beauty any day – and it doesn’t even have a place to put my paint bucket.
It could never do the job of our Werner multi-use ladder (which I love and cherish, despite the fact that it’s a little too heavy for me to one-arm) but it’d make the perfect light-bulb-changing, cobweb-dusting, quick-reach tool. You could leave it in the living room and call it art instead of dragging it out of the basement when the need arises. Too bad it’s still in the concept stages because I have a real thing for green. And tools. Green tools? Heavenly. Read the rest of this entry »
We’ve been living without a master bedroom closet for quite a while now. It’s become quite natural to walk down the hall to one of the spare bedrooms and rifle through the closet in there, using the entire bedroom as a changing area and place to pile up dirty clothes. It’s luxurious, really, having an entire room to store my wardrobe full of paint-spattered tank tops and torn jeans.
But we know, deep down, that a closet in the master bedroom is high on the list of things people consider necessary. And you know what? Stealing a few feet from one wall and turning it into a closet isn’t that difficult or expensive. It requires some basic framing and drywalling, but nothing too intimidating. If you’re a beginner, it’s a good project to learn some framing techniques on.
Our master bedroom closet will run the length of one wall about 8′ long, and will end about 1″ from the doorway. It will be a little over 2″ deep – you should make it at least 26″-28″ so you can hang clothes in there comfortably.
The materials for our closet include:
- framing lumber
- sheetrock and drywall compound
- wire shelving
- bar for hanging clothes
- two bi-fold doors
I’m figuring about $8 -100 in framing/drywall materials and another $120 for some decent white bi-fold doors in that shutter-style. We have quite a few leftover 2×4’s lying around so hopefully we can make use of them. You can get doors for around $40 each if you’re ok with cheaper styles and materials.
It won’t be fancy and all built-in gorgeous like I had once imagined, but that’s ok. Sometimes I get a wee bit carried away imagining all the fun carpentry work we could be doing if only we had about 40 extra hours in each day…..
Family Handyman has some great photos and a full run-down of the process here: http://www.rd.com/content/openContent.do?contentId=18160
Anyone have any fancy closets they want to show off?
Ariana of Becoming Home is truly a woman after my own heart… she’s decided to save herself a few dollars and make her own wall stencil. I’m going to bookmark this one, because that idea has been floating around in my head for quite a while but I’ve been too busy to actually start it. I’ll let her go first and figure out the pitfalls :)
I could be wrong, but I think the last Victorian Homes magazine had a house full of custom stenciled by an artist. Apparently the DIY stencil trend is really catching on. It seems like the perfect way to do something customized and put your stamp on your house… without a huge pricetag.
Ariana is using Istockphoto as her stock illustration resource, which is smart. That’s my favorite stock site for freelance work because prices are incredibly reasonable – usually between $1 and $10 – and they’ve got a good selection. As she notes, it’s not all great stuff – but vector art can be modified pretty easily if you’re handy with Adobe Illustrator! Check out her great pattern find, including my two favorites:


Read her post, and then we can all keep an eye on how the stenciling turns out!
As a designer-slash-organization enthusiast, I’ve been coveting the Just Organize Your Stuff (JOYS) system since the day I saw it. It’s productivity porn at it’s finest. And it’s so very lovely looking. Forget those plain-jane Franklin Covey binders with a calendar and some notepads. This thing is much more functional (and lovely. did I mention lovely?), with modules like “Home”, “Wealth”, and “Wellness”… in short, it’s a life organizer rather than a place to track tasks and meetings.
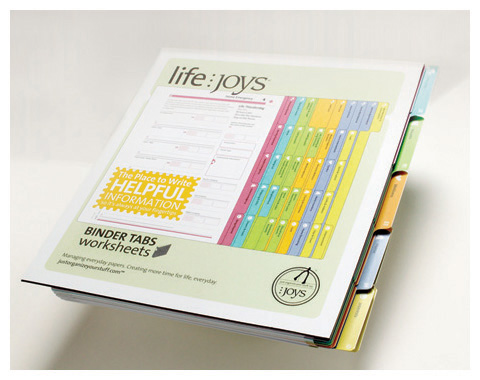
Pretty as can be.
So when I saw that I could win one for free from Kerflop just for writing about what brings me joy…. well, I couldn’t resist. Especially since one of the topics is Home. And despite all my griping about to-do lists and credit card bills and never ending construction messes, our home brings me a lot of joy.
When we bought The Fixer-Upper, I wasn’t a handy person. Home repair wasn’t something I felt compelled to learn. Never in my wildest dreams would I have imagined myself framing up a bathroom wall. Or wiring up an electrical circuit. Or renting a jackhammer to make a crumbling concrete patio disappear. I never imagined I would choose new plumbing over new clothes, or cancel a honeymoon cruise to pay for chimney repairs. More importantly, I never imagined that I would get so much joy out of something so physically and mentally draining.
But I do – time and time again. It’s what keeps me going when I’m exhausted, the bank account is drained, I miss my friends and family, and I just want to forget about drywall and take a nap. And it’s not just the big accomplishments that bring me joy. It’s great to finish a major remodeling project and bask in the gloriousness of an entirely new space you created from floor to ceiling – but I also get a kick out of the little things. Coming around the corner on my way home and seeing our cupola rising above all the other rooftops. Finding the perfect antique door knob at a salvage shop. Overhearing our neighbors discussing what hard workers we are. Staying in bed a little later than we should, making time to daydream about the next big project and how fabulous it will be.
Despite the fair amount of turmoil and frustration this house has given us, it has always been worth it. The good moments, little and big, always outshine the bad. And really, what more can you ask for?
(Hmmm…..maybe a JOYS binder system so I can keep track up with my hectic Fixer-Upper lifestyle?!)
Back when we first bought our house (almost 3 years ago… time flies when you’re stripping paint) I had wild fantasies about creating a schedule in Microsoft Project to keep us on track. I used Project in my previous job at a software company, so I knew how powerful it was to see things all mapped out. To have a visual representation, right there in front of you, of how one slip can impact 23 other things and throw your super cool timeline off by months.
I never got around to it, and now I’m glad I didn’t – we’d be so far off our original schedule that watching the lines extend out into infinity would have put me in an institution. But I know there are housebloggers out there who have done this, and if your timeline is tight (say, if you’re flipping a house in 2 months or something crazy like that) I’d recommend mapping out your fix-it plans. It keeps everyone on the same page, and it’s gratifying to move from milestone to milestone.
But $1000+ dollars for Microsoft Office? Totally not in any DIY’ers budget (and ridiculously overpriced, even if you had that kind of cash sitting around).
Lucky for us, the open source movement is going strong. Enter OpenProj, your free alternative to Microsoft Project. OpenProj is a free, open source project management solution. It bills itself as a complete replacement of Microsoft Project, and will even import Project files. So if you’ve been sneaking around at work making your schedules, you can finally bring them home ;)
Download it here: http://openproj.org/
Anyone out there want to weigh in on their favorite project management tools? I’m a sucker for productivity porn :)
There’s no escaping work here at Fixer-Upper. Even if you’re a guest. And a baby.

This beautiful babe visited us last night, and managed to find every single safety hazard in our backyard in a matter of minutes. Garden spade… ladder… big hunk of wood resting against the shed.. yep, she found them all. I don’t know how you people with children work on your house projects and still manage to keep them from losing an eye. We’ve got sharp and pointy objects scattered from one side of the house to the other at all times!
Hey, look at this. I’m actually posting when I said I’d post. You can’t see it, but I’m patting myself on the back right now. Which is pretty hard to do while typing – luckily, I’m double jointed.
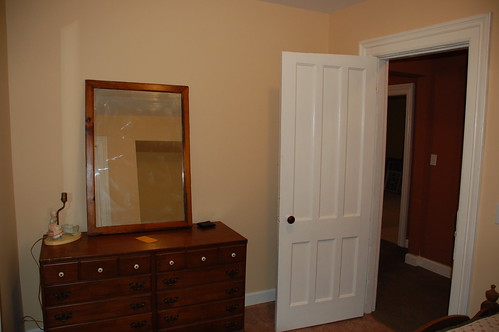
This is the larger of our spare bedrooms, a.k.a. “Tracy’s bedroom” because it’s the room my best friend crashes in when she’s too tipsy to drive home. (Downside to living in the ‘burbs: no taxi rides home.) It also serves as my walk-in closet. We don’t have a closet in our master bedroom yet, so we just took over other parts of the house. That’s one nice thing about having spare rooms – you can designate them as all sorts of things. You can take an entire room and declare it the “tank tops and sweatshirts storage area” if you want. Yep, we’re spoiled like that.
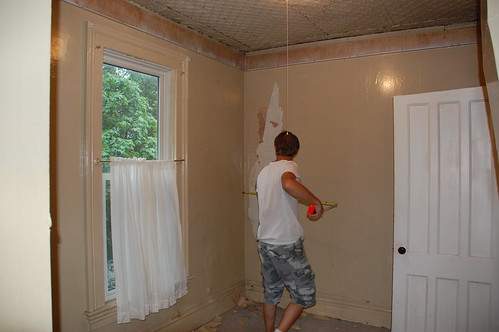
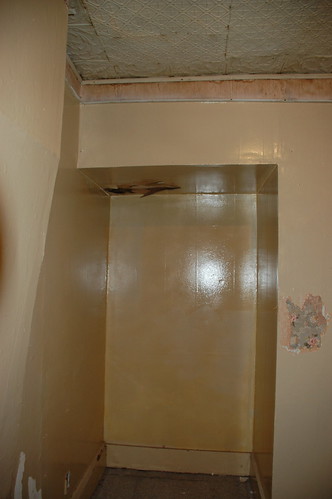
Anyway….enough babbling from me. The photos speak for themselves. I don’t have great “before” shots, but I do have this lovely one of the ceiling – you’re looking at the crumbling plaster that was hiding underneath a drop-ceiling when we bought the place. There was obviously a roof leak, which we fixed last summer.

Here, a photo showing where we replaced some crumbly plaster with new drywall and patched it all up good as new. You can also see a little bit of the floor in this pic -Â it was pretty worn out painted wood.

Now, the walls and ceiling are shiny and new, the trim is painted, and the floor has new wall-to-wall carpet. The closet could use a door, but for now a piece of fabric hides the clutter well enough.

Now when Tracy comes to stay, she won’t have to worry about little chunks of ceiling falling on her while she sleeps. Makes for a much more peaceful stay!

That dresser, btw, is my favorite of all times even though the drawers stick like crazy and the mirror is kinda foggy. It was my great-grandmothers. I refinished it a few years ago and added the white porcelain knobs. It’s got great curves!
I’ve been promising photos of our two spare bedrooms for about a month now, and I’m FINALLY ready to share. It took forever because the rooms were piled high with crap, because carpeting the upstairs meant moving furniture and clothes and random doodads from room to room as we went along. It was actually a great excuse to look at all the stuff we’ve been stashing away in closets and purge all the things so unnecessary we didn’t even remember owning them. I love a good clean-sweep. But it took us forever to get things back into place. We really should have shared pics of the rooms in their full bomb-went-off glory, because it would help explain why I’ve arrive ten minutes late for work every morning for the past two weeks.
So without further ado, here’s the before/after of Bedroom #:
BEFORE:
AFTER:
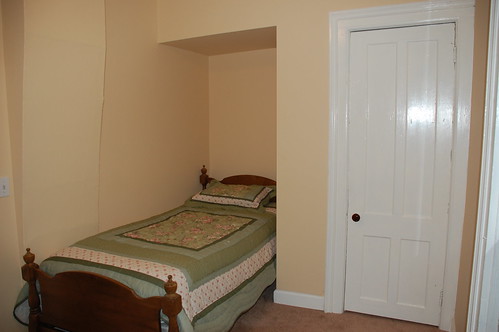
This room got new 3/8″ drywall on all walls, a new ceiling, a new coat of paint on everything, and a carpet to make it cozy. It took us about 2 weeks to get through that list, but the room looks sooooo much different. It’s really pretty amazing.
The paint is a nice creamy pale yellow that brightens everything up. The room is small, so rather than go for my usual heavy colors I went super light and bright.
Tomorrow I’ll share room #2 with you :)
|

